


Kelvin controlled sunlight
 If you've ever wanted different controls on the mrSun, like kelvin settings, then you'll find this tip helpful...well, in certain situations at least. Read on for more info.
In this tip I'll explain how you can use a light shader to control the color of your sunlight with either a color swatch or shaders like the blackbody/CIE_D shaders. First let me explain a few important things.
1. When you assign a light shader to a light, you're bypassing a lot of the features of that light. For example, if I assign a point light shader to a photometric area light then that light "becomes" a point light instead of a photometric area light.
2. If you're using GI or Caustics, any of the photon shooting options, then you'll want to pass on this tip. Again, when assigning a light shader you're bypassing alot of the features of the original light. In this case the photon targeting option on the mrSun will not work...so I do NOT recommend using this method with GI or caustics. However, it works well for those scenes where you use FG only or perhaps even Irradance Particles/IP.
NOTE: As always, I recommend that you make a backup of your mental ray folder before adding custom shaders or tweaking exisitng shader .mi files.
3. You'll need to install some custom shaders for this tip. You'll also need to have already unlocked & modified the blackbody/CIE_D shaders from the existing .mi files. If you don't know how to install custom shaders or edit existing .mi files then you can find info on that via a Google search, reading through my blog, or if you're moreso a visual person you can check out my video "Installing Plugins, Scripts, and Shaders". BTW, if you're using 2010, the steps for unhiding/editing the blackbody & CIE_D shaders is a little different from previous versions, see this LINK for more info.
NOTE: If you're using 3ds Max/Design 2010 see point #7 at the very bottom of this entry for a tip if you're getting a startup mental ray error message after installing the shaders_p.mi file.
4. The custom light shader that I'll be using is the "P_DirectTK" light shader made by Pavel Ledin. You can download it from his website. You can't download this single shader, you'll need to get his shader pack that contains all the shaders in one lump. To do so you'll just scroll down to the bottom of the page I listed above and you'll see links to his shader packs for Maya, 3ds Max, and XSI. Download the approprate version for whatever version of 3ds Max you're using and install the shaders.
Now that you've installed the Pavel Ledin's shaders and unhidden/edited the blackbody & CIE_D shaders, I'll explain how to use them to create a kelvin controlled sunlight in a 3ds Max scene.
Step01: Start 3ds Max and create/load a scene. I used Tyson Ibele's procedural building generator to quickly add some geometry to my test scene. I then added a daylight system containing the mrSun/mrSky.
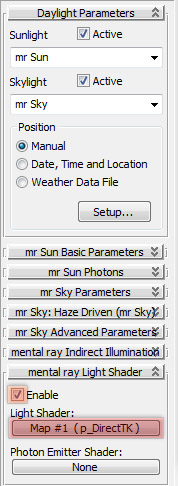
Step02: Scroll down to the mental ray Light Shader rollout at the bottom of the daylight settings. If you don't have the mental ray Light Shader rollout at the bottom of the daylight system that's because you're using one of the design-viz preset UI's. You can either switch default UI's or edit your "CurrentDefaults.ini" file to unhide it. See THIS post for instructions on that process if needed.
Once you've expanded the mental ray Light Shader rollout you'll assign the p_DirectTK light shader to the empty light shader map button. Once assigned, drag the p_DirectTK light shader over to your material editor as an instanced copy so you can modify it's settings.
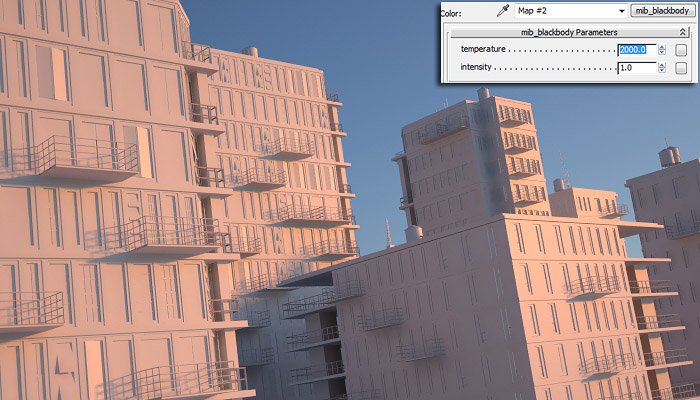
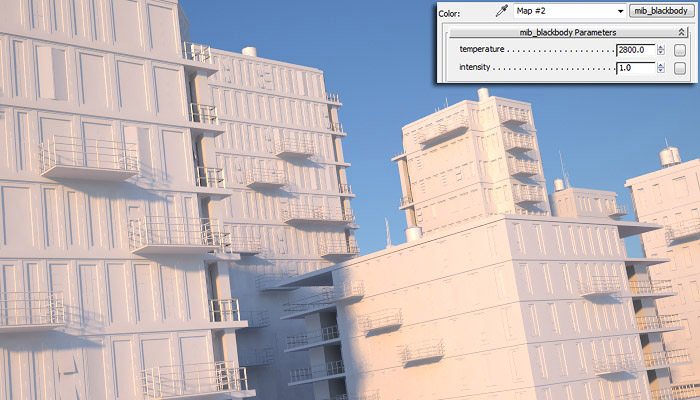
Step03: Adjust the settings on the p_DirectTK light shader to taste. I added the blackbody shader to control the color of this light. You'll also need to adjust the Intensity values because the sun is bright...
For more info, see this screen capture with notes (click to enlarge):

Voila...you're done.
While I used this particular light shader with the mrSun, you don't have to ONLY use it with the mrSun. You can use it or other light shaders on any light source you choose. Just keep in mind that when you do assign the light shader you're no longer using the default light controls.
Things to watch out for when using this method:
1. The photon targeting issue I described at the beginning of this article.
2. Your mrSun is now a direct light due to the light shader.
3. None of the mrSun controls work however the mrSky controls still do.
4. The enable/disable option on the mrSun is ignored when the enable option is checked on the light shader. Keep this in mind if you add another light to your scene and it doesn't seem to work. It's may be because the light shader option is enabled on your new light but no light shader is defined. So be sure to make certain the light shader enable switch is disabled on those lights that don't use a light shader.
5. You'll need to animate the controls manually or possibly use the wire parameters to try controlling things like intensity from the mrSun values (not sure if that will work...just throwing the idea out there). In other words, you'll need to manually control things like color change from noon to dusk and/or light intensity...it's not automagic like the mrSun options.
6. If you assign a light shader like this direct light shader to a light that has falloff/decay/attenuation like a photometric light, that functionality will no longer work. It will become a direct light with no decay....which is 'ok' for a bright sun. Also keep in mind that this is not the only light shader available, some of the light shaders do have attenuation/decay controls if that's needed.
7. If you get the error message that says this: "API 0.0 error 301010: .\shaders_standard\include/shaders_P.mi, line 15: mi file requires ray version 3.6.99 or older, this is 3.7" then there's a simple fix for that.
Just open the shaders_p.mi file in your favorite text editor and near the top you'll see a listing for min version and max version. The max version is listed at "3.6.99". Simply change that to something higher than 3.7, something like 3.9.99 will do. The reason for this error is that 3ds Max 2010 uses mental ray v.3.7.51.20 which is out of the specified range of this .mi file so it kicks up an error.
If you like you can also completely disable the max version code by putting a pound sign (#) in front of "max version" to disable it instead of changing the values.