


Importons & Irradiance Particles Passes
 After the new implementation of Importons and Irradiance Particles on the Mental Ray 3.6 release, artists have new tools available to help them achieving the results they're looking for.
Autodesk's 3D Studio Max 2009 and 3D Studio Max Design 2009 users, have access to these new features, thanks to the ctrl.ghost shader, written and shared by Maximilian Tarpini on this thread at CGTalk, where you'll get an explanation about this subject. You have on the shared file, instructions about the correct installation of this shader. You can also see instructions on how to use it in your scene at Jeff Patton's blog.
In order to show some of the new features and how they interect with each other, we are making several tests to illustrate the visual impact of this interaction along with rendering times.
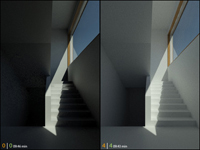
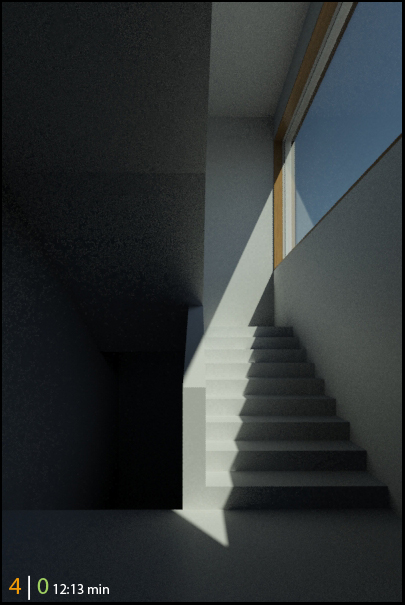
For these tests, we'll be using a simple interior scene with default Arch&Design materials. The scene isn't our original design, we used a photo from an architecture project from ARX published on a Portuguese architecture magazine called Arquitectura & Construção, at page 67. We're using Physical Sun and Sky and a Sky Portal on the window.
Some wireframe screenshots: 
For these tests, we'll be using Importons + Irradiance Particles and maintain all the default settings, then we'll start to mess with some settings and see its impact on the image and rendering times. The exposure values are all the same throughout these tests for comparison sake.
Trace Depth and Passes
On this test we'll be changing the Trace Depth and Passes parameters. These two settings have to do with light bounces on the scene. We'll see how each one individually and in relation to the other influenciates the light in the scene.
First we'll increase the Trace Depth values, starting at 0 and up to 4 with 0 Passes, then we'll do the same but with 1 Pass until we reach a Trace Depth of 4 with 4 Passes. This will serve for us to do an image chart and see the relation between these two parameters.
Trace Depth is the diffusion of importons in the scene. If it's set to 0, this means that we'll not get a secondary bounce, if we set to 1 it then we'll be getting a secondary bounce and so on. This setting also works in conjunction with the Traverse settings but we'll not refer to this on these tests.
Passes is the parameter where we control the number of indirect bounces of Irradiance Particles in the scene. If we set it to 0, we'll be getting only a direct light pass. Increasing this value will also increase the amount of indirect light passes in the scene.
The relation between these too parameters will have an huge impact on the amount of light we'll get on the rendered image.
On the 1st image, you can see the scene rendered with no secondary bounces or passes. The grain we’re getting is due to the low Irradiance Particles number, so don’t worry about that. The image took 09:46 min to render.
The 2nd image was rendered with 4 secondary bounces of Importons and 0 secondary passes of Irradiance Particles. It rendered for 12:13 min.
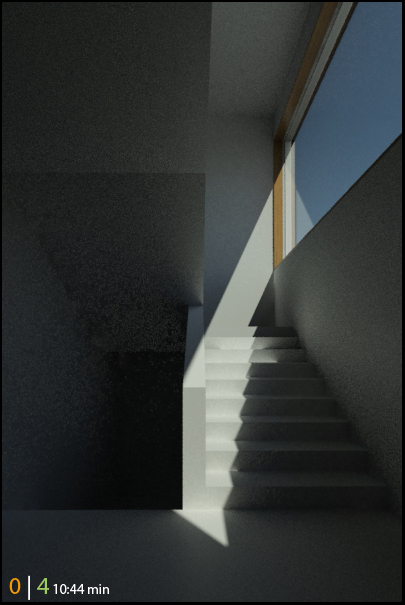
On the 3rd image we used 0 secondary bounces of Importons and 4 secondary passes of Irradiance Particles and it took 10:44 min to cook.
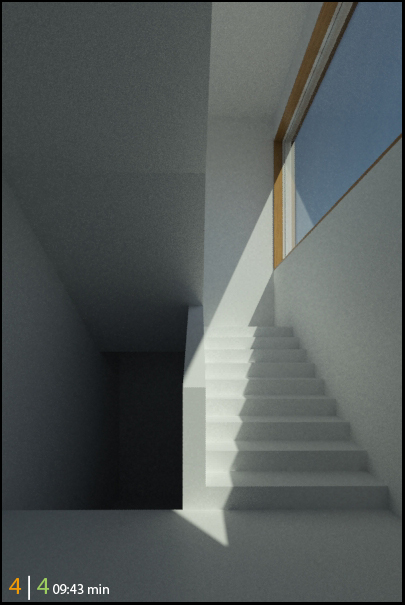
The 4th image was rendered using 4 Importons secondary bounces and 4 Irradiance Particles secondary passes. It rendered for 09:43 min.
| Image 01 |
Image 02 | Image 03 | Image 04 |
 |
 |
 |
 |
Good to know that we can get an image with more light bounces/passes with lower render times :)
We've made several tests with different Importons bounces and Irradiance Particle passes, stating the render times.
 Get the high resolution image chart here.
We can see from all these tests that the Importons secondary bounces or the Irradiance Particles passes by themselves, don't affect much the light distribution but as soon as these two parameters start to work together, the scene starts to receive more light. For each increment of one Importons secondary bounce the render times start go up too. If you notice the render times as we add more Irradiance passes, start to decrease, which is good because we get more light with less render times. We only made tests until we reach 4 secondary bounces/passes just to illustrate the relation between these two parameters but if you add too much light bounces/passes, the scene light starts to look unrealistic due to lack of contrast.
We hope you enjoyed these tests and hope it help you to understand better these features. We’ll continue to make more test on the remaining parameters.
Stay tunned!!