


How to: Skydomes in 3dsmax with mental ray (and FG)
Ok, so you've purchased some really nice panoramic sky bitmaps, like these:
https://www.doschdesign.com/product...ding_Skies.html
http://www.turbosquid.com/FullPrevi...x.cfm/ID/309623
Nice right?...But in order for them to look their best your need to map them to a "skydome" object. Naturally that isn't a real difficult task, but what if you want to use the mrSun & FG with your skydome? Chances are it'll block the mrSun, which is an easy fix by adjusting the shadow options on the dome properties...but that's just going to allow indirect lighting from the mrSun...what about some skylight?
Well, if you add a mrSky or standard skylight to your skydome scene, the skydome will also block the indirect illumination from the mrSky or skylight. Unfortunately there's not a simple switch that you can enable/disable on the skydome mesh to allow FG to pass through it. But don't worry, in this post I'll show you how to work through these issues with a ray switch shader from the production library.
To begin here's an example animation I setup using the mrSun and a skydome:
Here's a link to download the video (right click, save as):
/images/stories/JeffPatton/Blog/Skydome_anim.mov
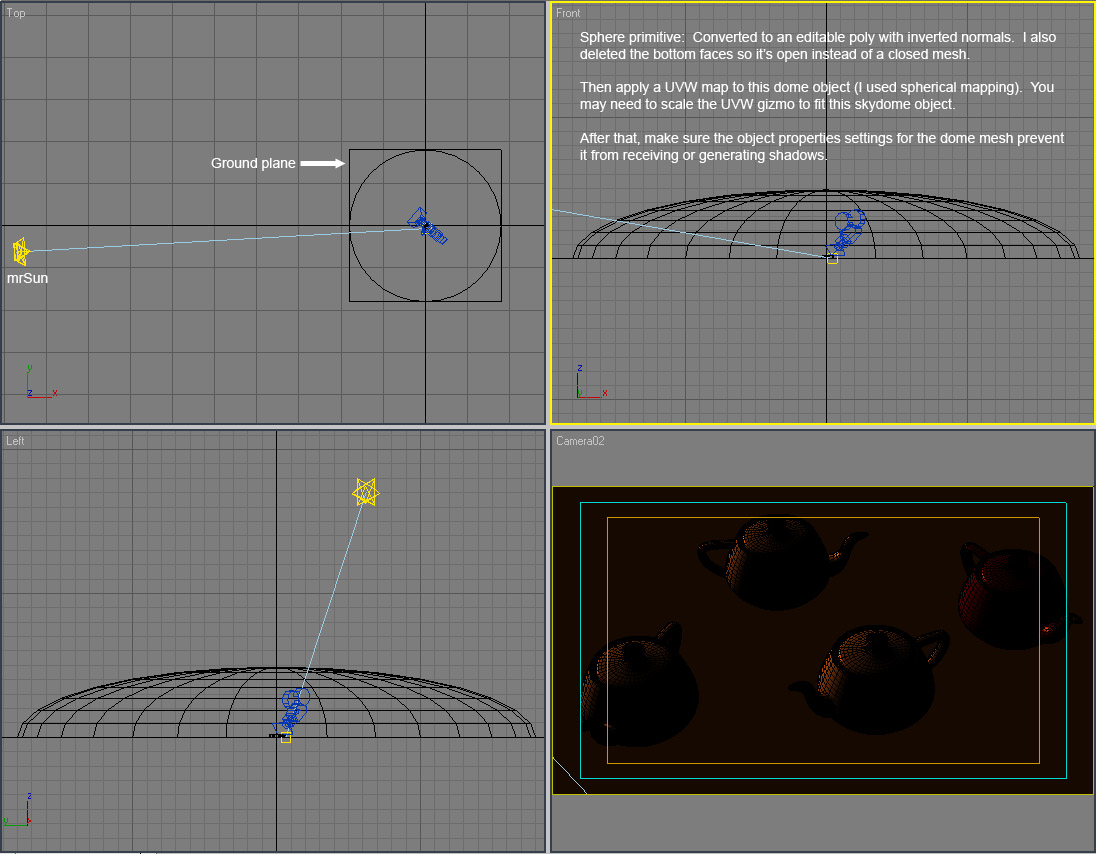
I opened 3dsMax9 and created a ground plane in an empty scene. I then added a sphere primitive that was slightly larger than my ground plane. I converted the sphere primitive to an editable poly, inverted the normals and deleted the bottom faces. From there, I scaled the sphere down (flattened it from the top). After that, I added a UVW modifier. Here's a screen capture of the scene:
Screen capture of scene setup (click to enlarge)
The production shaders in 3ds Max 2008 come with a few "ray switchers". For more information on the production shaders, check out the production shader information either in the help files of 3ds Max 2008, or at Zap's blog here:
http://mentalraytips.blogspot.com/2...easures-of.html
In my example scene I have applied a raytype switcher shader to the skydome mesh. Here's a screen capture with an explanation of the maps I used: (click to enlarge)
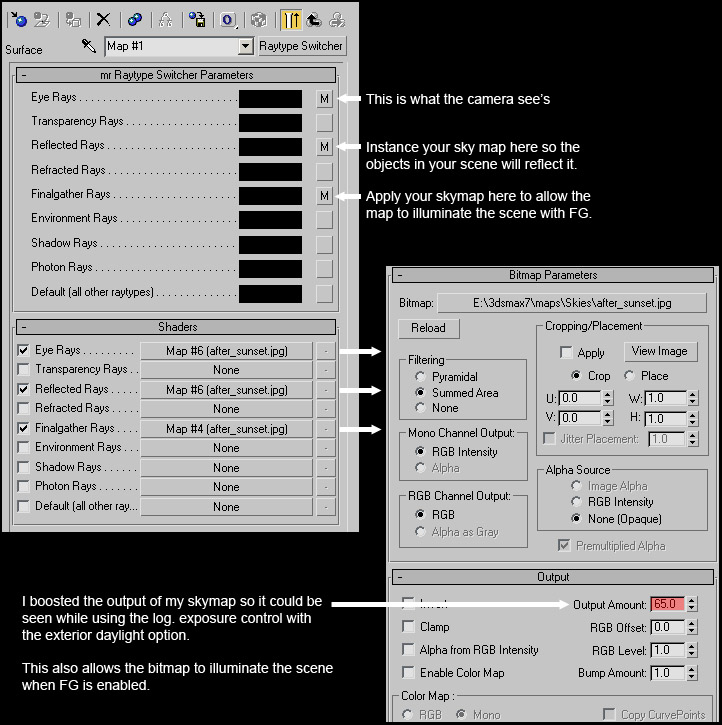
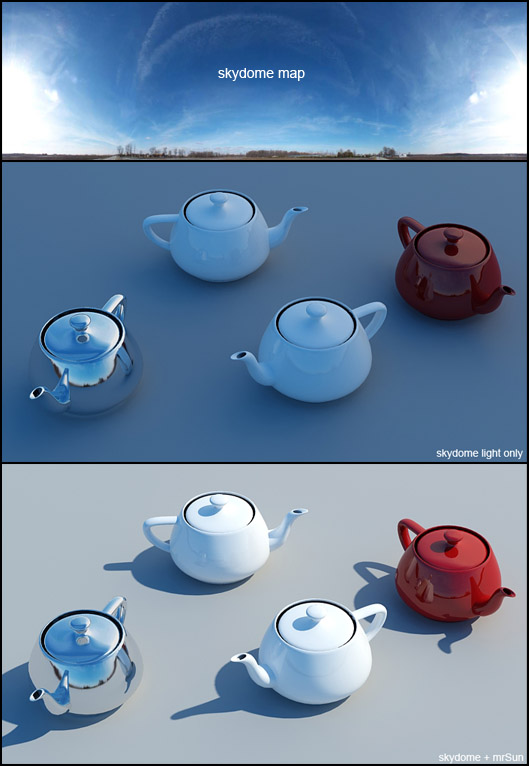
In a nutshell I placed my panoramic sky map in the "Eye Rays", "Reflected Rays", and "Finalgather Rays" swatches. By boosting the output amount on the Eye Rays & Reflected Rays maps the panoramic bitmap can be seen when using the log. exposure control (with exterior daylight option enabled). By boosting the output amount of the FinalGather Rays, the skydome will actually generate indirect illumination when FG is enabled. The indirect illumination will generate the colors of the skydome map.
All this may sound complex in text...but in an actual scene you'll see that it's rather simple. Here's a Max9 scene:
/images/stories/JeffPatton/Blog/Sky_dome.zip
I created this in Max9 so 3ds Max 2008 users can also open the file. If you're using Max9 you'll need to install the production shaders from 3ds Max 2008. Instructions on doing this can be found here: http://forums.cgsociety.org/showthread.php?f=6&t=554087
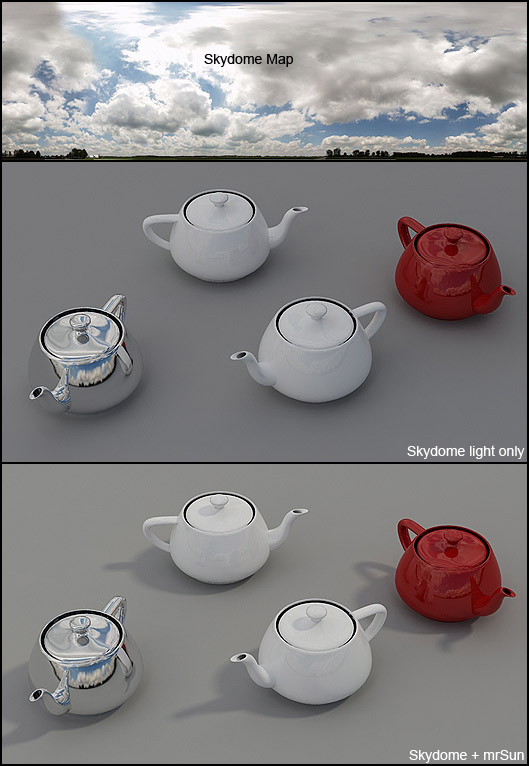
Here's some additional sample renders where I used various panoramic images mapped to the skydome:
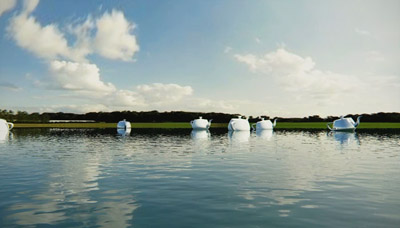
Sample 01 (click to enlarge)
Sample 02 (click to enlarge)
Sample 03 (click to enlarge)

Naturally I can't supply the panoramic bitmaps I used in these scenes because they are purchased assets of mine.